Posted on: 26th July 2018 by Dr. Junjie Wang
In the first blog in this series about aluminium surface cleanliness, I discussed the importance of cleaning and the different types of cleaning. You can read it here.
Effective cleaning to sufficiently remove the near-surface disturbed layer is vital for good corrosion resistance after coating. It also affects the long-term durability of adhesive bonding of aluminium automotive body sheet. However, excessive cleaning may also cause problems. One such problem is copper re-deposition/enrichment on the surface of copper containing aluminium alloys such as AA6xxx alloys. This is detrimental to the corrosion resistance of the alloy. Furthermore, excessive cleaning also increases the cost of maintenance of the cleaning section of the finishing line.
Therefore, it is important to know how to evaluate the surface cleanliness of aluminium automotive body sheet. This is to achieve surface quality control and to optimise the cleaning process in production.
In this blog, I’m going to talk about sheet surfaces and how to evaluate the aluminium surface cleanliness using microscopy.
Transmission electron microscopy
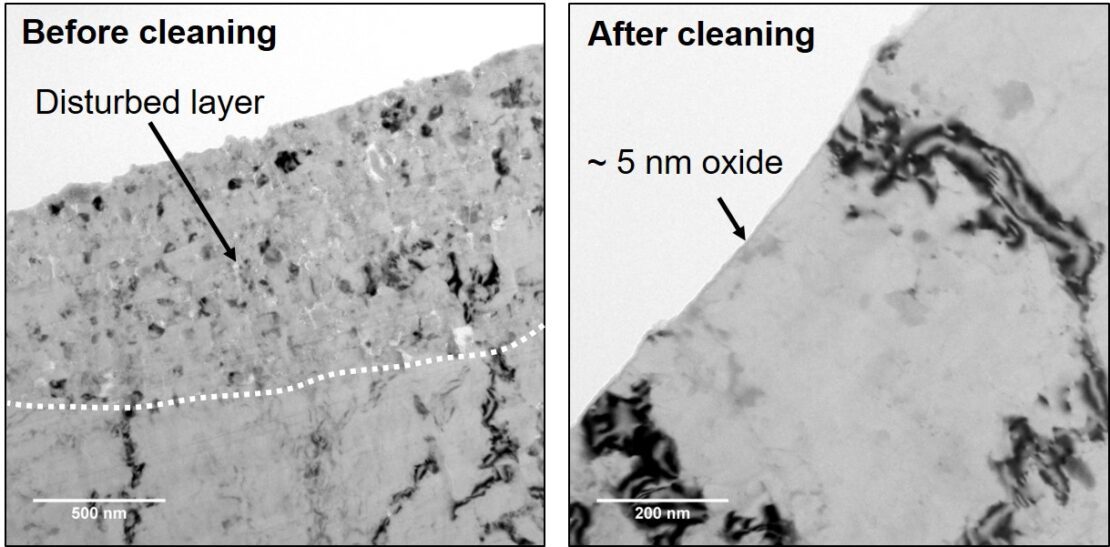
Transmission electron microscopy (TEM) has been the main research method to examine the near-surface disturbed layer since it was ‘re-discovered’ in the 1990s. This involves specimen preparation using either ultramicrotomy or focused ion beam milling. You can read about ultramicrotomy in a previous blog post here.
TEM can analyse the chemical composition, microstructure and thickness of the deformed layer. The major drawbacks of this method are the very limited size of specimen that we can prepare and examine each time, as well as the cost and time involved.
High resolution low accelerating voltage scanning electron microscopy
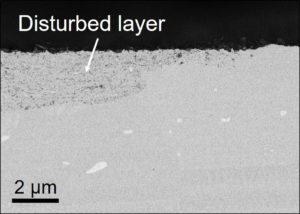
We can use high resolution low accelerating voltage scanning electron microscopy (low kV SEM) for cross-sectional examinations. In this case, we examine the ultramicrotomed sample block, rather than the thin specimens for TEM.
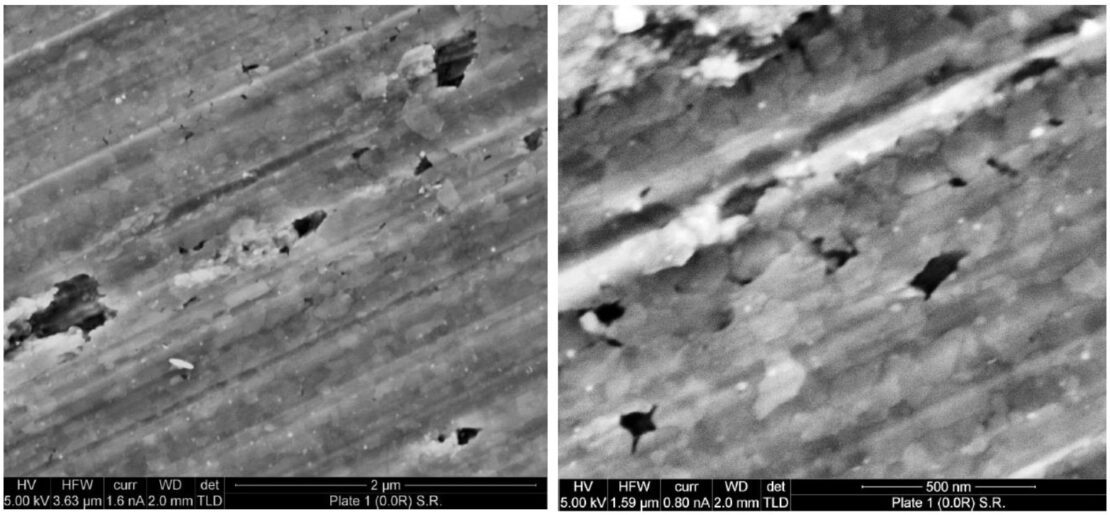
The low kV SEM has the capability of imaging the ultrafine grained disturbed layer directly on the rolled aluminium alloy surface by the channelling contrast of backscattered electrons. However, the topography of the rolled surface influences the effectiveness of this technique.
This is especially true for aluminium automotive body sheet rolled with electro-discharge textured (EDT) rolls. The surface roughness Ra is in the range of 0.3 – 0.6 µm for a mill finish surface and 0.7 – 1.3 µm for an EDT surface.
Optical microscopy
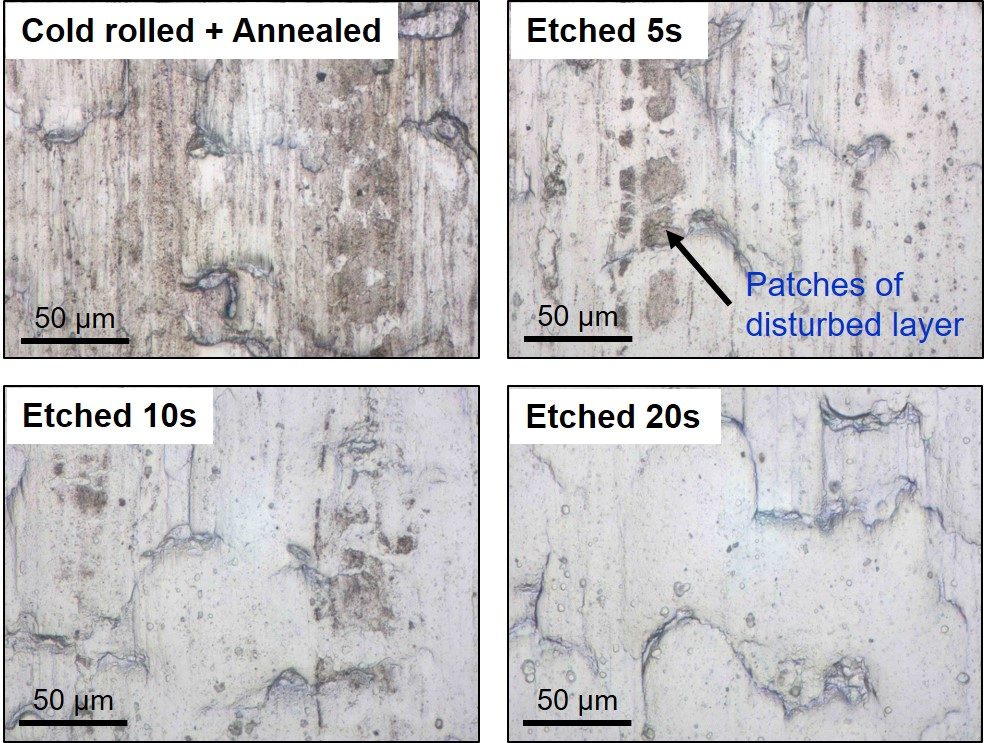
This technique depends on the optical characteristics of the disturbed layer which reduces the reflectivity to visible light particularly in the short wavelength range. This makes the disturbed layer appear in brown or yellow in contrast to the silver white aluminium.
Figure 4 shows the visual appearance of the surface of AA5182-O automotive sheet with progressive cleaning. The freshly exposed aluminium alloy surface progressively replaces the original brown surface. Consequently, we can see the gradual removal of the disturbed layer.
This optical approach has many advantages, including a relatively large sampling area compared to electron microscopy and simple sample preparation. There’s also the rapid observation and data collection and the use of low cost equipment. The relatively large examined area is important for a meaningful quantitative analysis of the coverage of the deformed layer on rolled aluminium sheet surfaces. Our experience shows that observation using an optical microscope at a magnification of 500x or 1000x is best.
Evaluating your aluminium surface cleanliness
The Materials Testing team at Innoval offer all the techniques I’ve described in this blog. We either use our in-house equipment or we send someone to use the equipment at nearby universities. Our extensive in-house characterisation and analysis capabilities can get to the root cause of most surface problems, including corrosion.
Cleaning, pretreatment and corrosion are just some of the topics we cover in our Aluminium Automotive Sheet Training Course. The next one will take place on 6-8th November 2018 here in Banbury. It will be 2.5 days long and includes a visit to Jaguar Land Rover’s Castle Bromwich manufacturing plant. You can download a registration form from the training course link above.
In my next blog, I’ll discuss evaluating aluminium surface cleanliness using total reflectance measurement and colourimetry.


